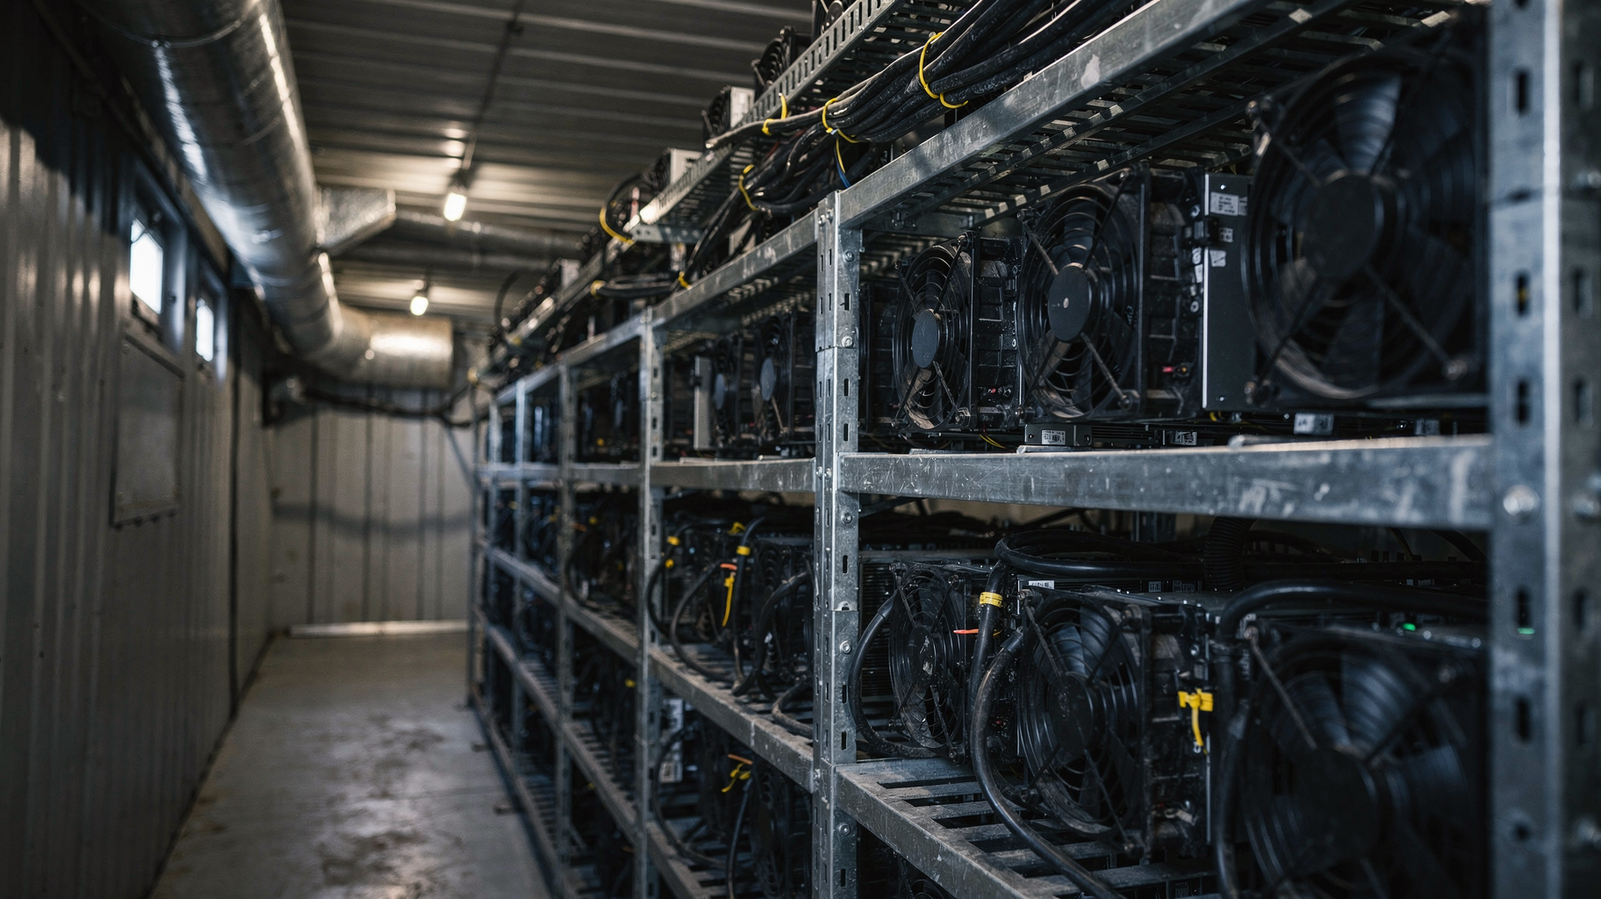
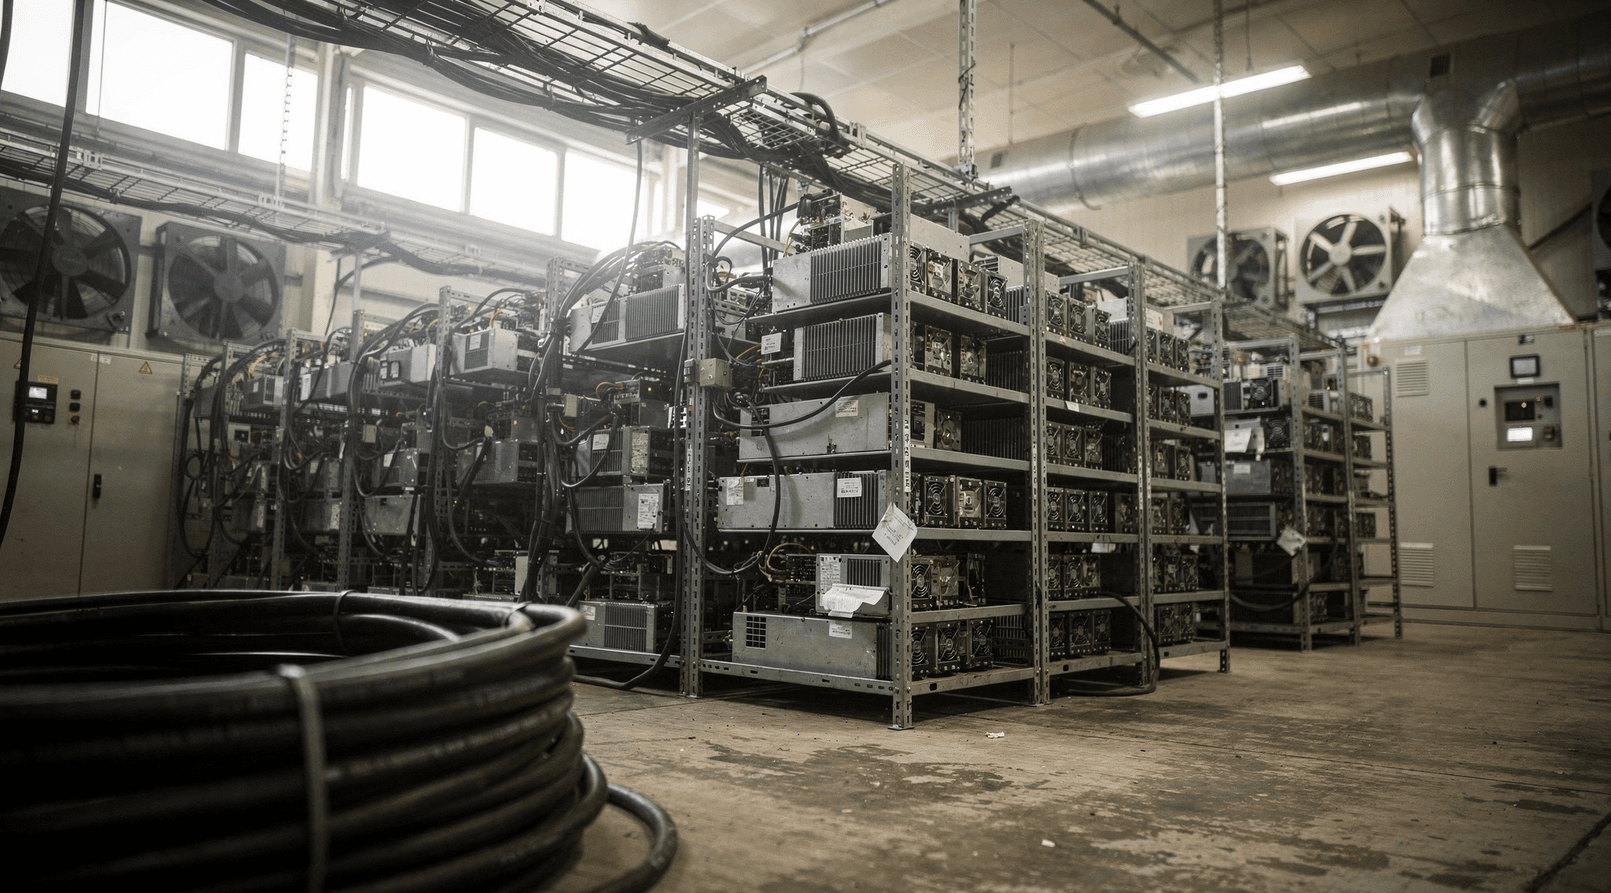
ICERIVER KS7 – User Guide
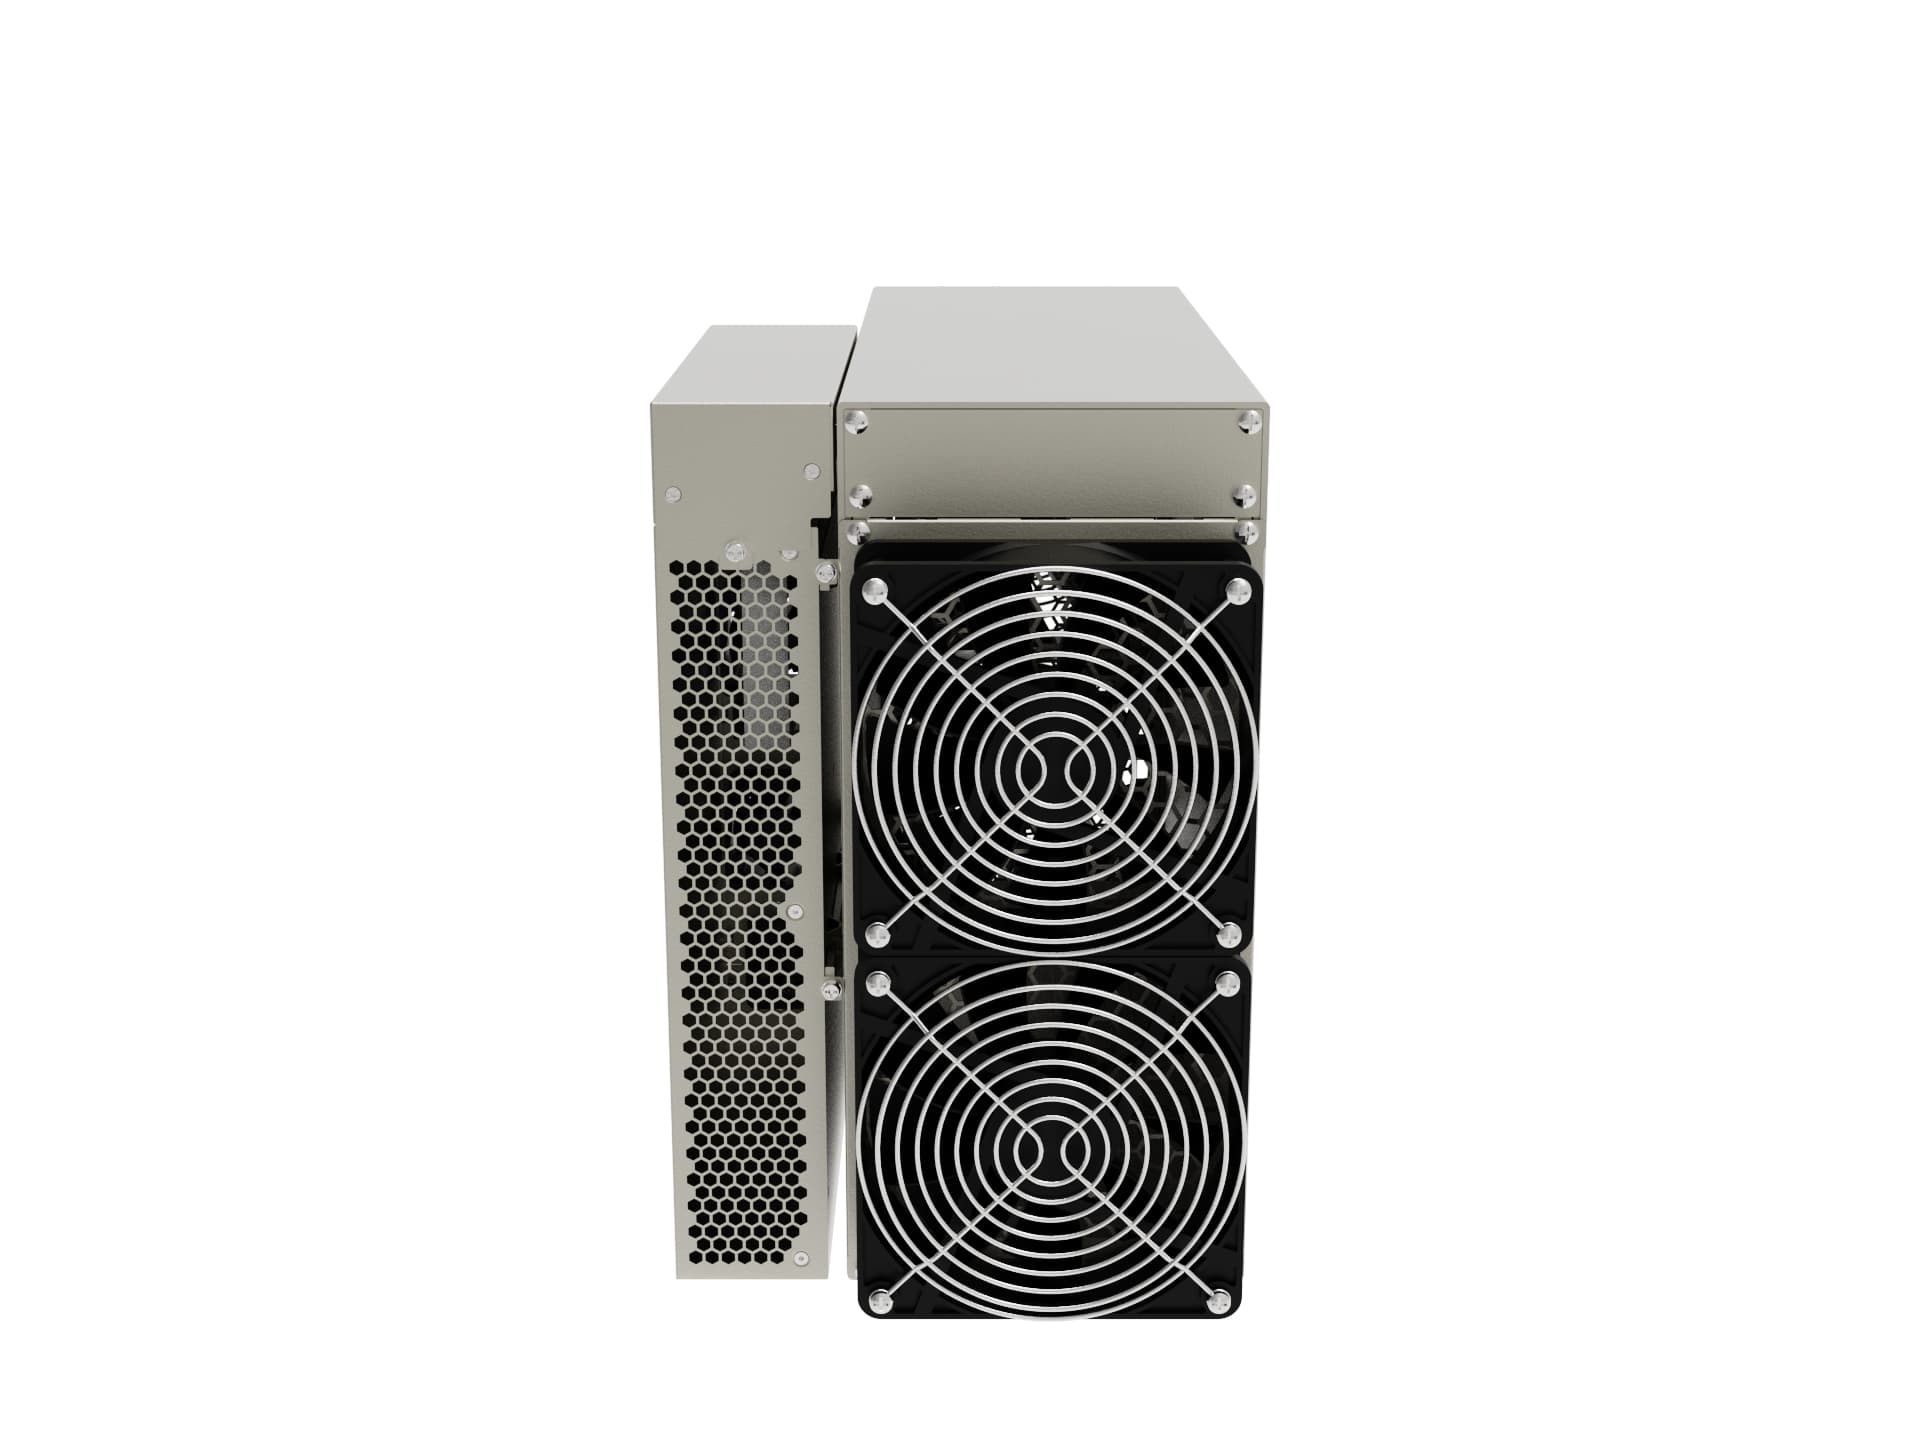
General information
We recommend reading this guide carefully before you start working with the product, and keeping it for future reference. For more information, visit:
https://www.iceriver.io/tutorial/
1.1 Installation guide
- Check whether the packaging is deformed, whether the device housing is damaged, and the same for the fans and the cables. Check whether the device is making unusual noises.
Do not disassemble the device yourself – this voids the warranty. - Before installation, check for physical obstructions that could damage the device, and beware of the risk of electric shock.
- Before connecting to the power supply, read the installation instructions at:
https://www.iceriver.io/tutorial/ - The socket must be located close to the device and be easily accessible.
- Use a stable voltage.
- Before switching on, check that all cables are securely and correctly connected.
- The device must not be connected directly to a mains electrical source, but through double or reinforced insulation (applicable to devices without a built-in power supply).
- The device is accessed through a web interface.
Default user name: admin
Default password: 12345678
You must change the password after the first start-up.
1.2 Operating environment
- Because of the high temperature during operation, do not cover the device and do not place flammable or explosive materials around it. Do not block the ventilation openings.
- Do not place the device near water or in a damp environment. Keep it clean to prevent dust, hair and other particles from getting inside. Do not insert objects into the openings.
- The device must be used at an altitude below 2000 m. A higher altitude reduces cooling and shortens the life of the fans.
- Leave free space around the device.
Operating temperature: 0 – 40°C
Humidity: below 90% RH
Avoid condensation. - Place the device somewhere stable and secure.
- It is not suitable for environments where children are present.
1.3 Maintenance
- If you notice an unusual smell, noise or smoke – switch the device off immediately and contact a service center.
- Unauthorized replacement of the power supply is forbidden. It voids the warranty.
- Keep your hands and fingers away from the spinning fans.
- Switch the device off during thunderstorms or when it will not be used for a long time.
- Do not overload the sockets or the power cables.
- Do not open the device – only authorized service personnel may do so.
- Do not knock or drop the product.
- New firmware can be downloaded and installed through the web interface.
- If there are problems, you can restore the factory settings with the Reset button.
- Before cleaning, first disconnect the device from the power supply. Do not use liquids – only a dry cloth or brush.
1.4 Basic troubleshooting
- The device must be inspected by a service center if:
- The power cable is damaged
- Liquid has got inside
- It has been exposed to moisture
- It has been dropped or is visibly damaged
- It does not work normally
- The device does not switch on:
- Check the power cable
- Check the input voltage (200–250V)
- The network indicator is not lit:
- Check the Ethernet cable
- Overheating:
- Check the ambient temperature
- Check whether the fans are blocked
1.5 Repair and warranty
- All sales are final. Returns and exchanges are not accepted unless the law requires otherwise.
- Warranty: 180 days from the delivery date.
- The warranty does not cover:
- Incorrect installation or use
- Mechanical damage
- Moisture, fire, flooding, lightning
- A missing or damaged serial number
- Modified firmware
- Unauthorized replacement of components
- If you have a problem, submit a request at:
https://support.iceriver.io/requests/new/
1.6 Disclaimer
The information in this guide may be changed without notice. The manufacturer is not liable for inaccuracies or for damage arising from its use.
1.7 FCC statement
The device complies with Part 15 of the FCC rules and must not cause interference.
1.8 EU declaration
The product complies with the directives:
2014/30/EU (EMC)
2014/35/EU (LVD)
2011/65/EU (RoHS)
1.9 Directive 2012/19/EU (WEEE)
The product must not be disposed of with household waste. Hand it in for recycling at an authorized collection point.
⚠️ Note
Because of the length limit, the next message will continue with:
- 2. Product overview
- 3. Functions (full)
- 4. Common problems
2. Product overview
2.1 Appearance
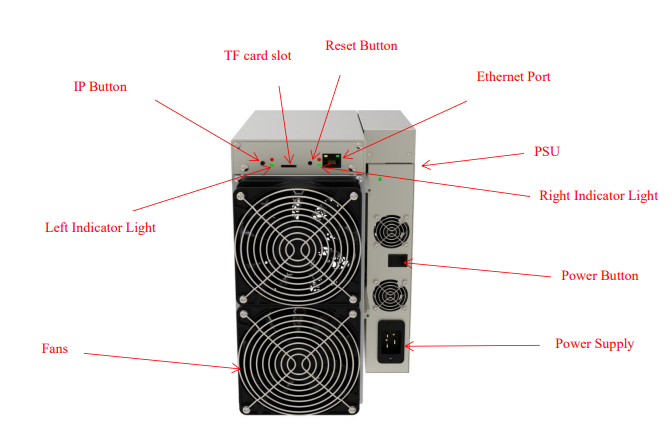
Parts of the device:
- IP button
- TF card slot (microSD)
- Reset button
- Ethernet port
- Power supply (PSU)
- Right indicator light
- Power button
- Power input
- Left indicator light
- Fans
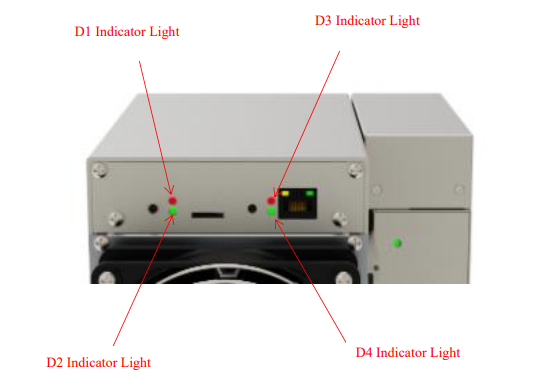
Description of the indicator lights
Machine state Indicator status
Normal operation - D2 flashes, D1, D3, D4 are off
Fan problem - D1 and D3 flash, D2 and D4 are off
Network problem - D1 and D2 flash, D3 and D4 are off
High temperature alarm - D2 and D3 flash, D1 and D4 are off
Technical specifications
Power supply:
AC input: 200V – 250V, 50–60Hz
Product specifications:
- Hashrate (KAS): 30 TH/s (±5%)
- Consumption: 3500 W (±10%)
- Dimensions: 430 × 195 × 290 mm
- Net weight: 16.5 kg
- Connectivity: Ethernet
- Operating temperature: 0 – 40°C
3. Functions
3.1 Start-up
3.1.1 Precautions
- Check for physical damage and beware of electric shock
- Check that the cables are securely connected
- Keep the hash boards away from water and moisture
- Ambient temperature: 0–40°C
- Altitude: below 2000 m
- Do not cover the device while it is running
- Do not place flammable or explosive substances nearby
- Humidity: below 90%
- Keep the environment clean
- Use a stable voltage
- Damage caused by an unsuitable environment is not covered by the warranty
- Do not disassemble the device without permission from ICERIVER
3.1.2 Checks before start-up
- Check the packaging for deformation
- Check the housing, the fans and the cables
- Check for unusual noises
- Check that the cooling radiator is firmly seated
Note: Disassembling it yourself voids the warranty.
3.1.3 Start-up (Boot)
- Connect the device to Ethernet
- Switch on the power
- During start-up the red and green lights stay on continuously
- Wait for D2 to start flashing and for D1, D3 and D4 to go out
➡ This means the start-up was successful
➡ If D2 does not flash for more than 10 minutes – check the network
3.2 Accessing the device
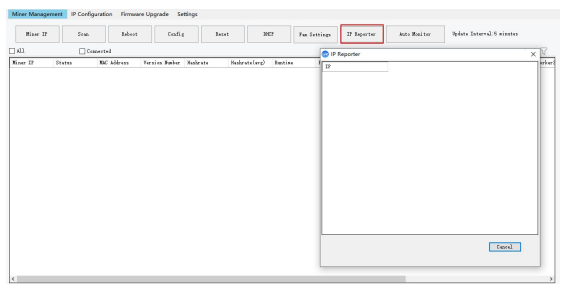
3.2.1 Obtaining the IP address
- Download the IP detection tool from:
https://www.iceriver.io/tutorial/ - Click “Detect IP”
- Hold the IP button on the device for 1–2 seconds
3.2.2 Logging in to the web interface
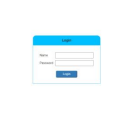
- Open a browser (Chrome is recommended)
- Enter the IP address
- Log in with:
- User: admin
- Password: 12345678
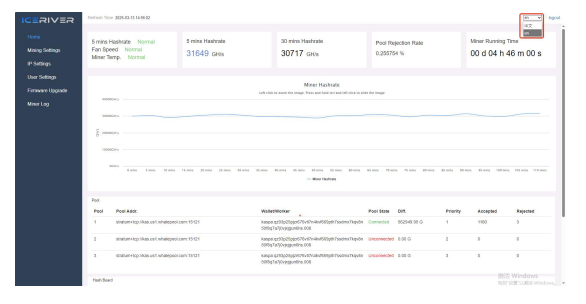
3.3 Changing the language
Click “Language” in the top right corner to switch between Chinese and English.
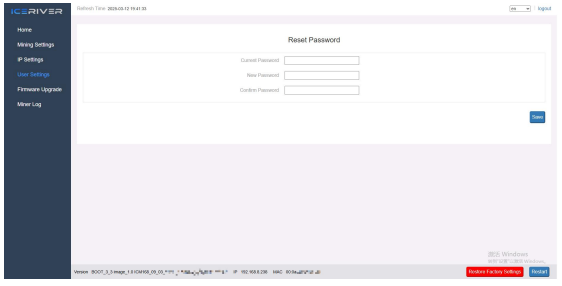
3.4 Changing the password
For security, change the password after the first start-up:
- Go to “User Settings”
- Enter the old and the new password
- Click “Save”
- Log in again with the new password
3.5.1 Adding a pool
- Go to “Mining Setting” → “Pool Configuration”
- You can add up to 3 pools
Example:
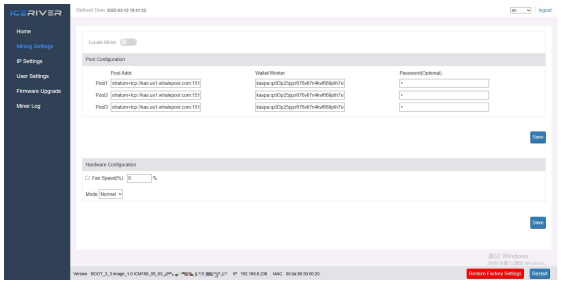
Pool1:
stratum+tcp://kas.eu1.whalepool.com:15121
Wallet/Worker:
kaspa:YOUR_ADDRESS.worker
The password is optional and does not affect mining.
- Click “Save”
- Restart the device
- When the status is “connected”, the pool is active
Notes:
- Do not use the factory settings
- If Pool1 drops out → Pool2 is used automatically
- If Pool2 drops out → Pool3
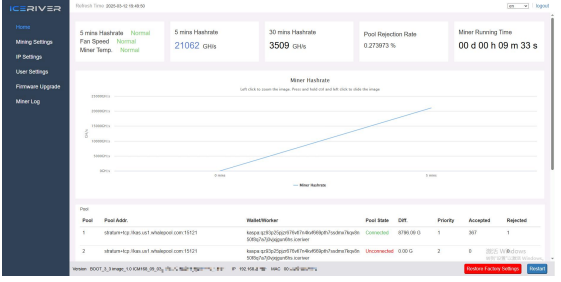
3.6 Viewing the hashrate
- Click “Home”
- After 5 minutes a hashrate chart will appear
- The data is refreshed every 5 minutes
- “Hash board” shows the temperature and the fan speed
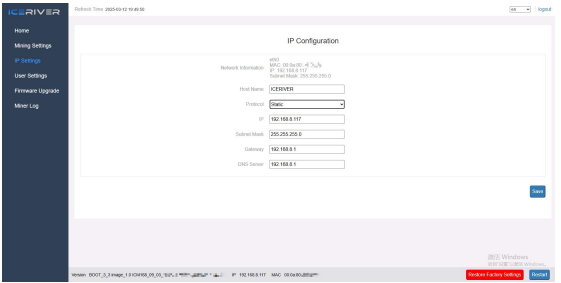
3.7 Network settings
Default: DHCP
For a static IP:
- “IP Settings” → Protocol → Static
- Enter the IP details
- “Save” → “Reboot”
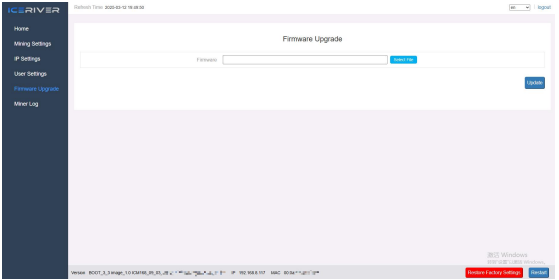
3.8 Firmware update
- “Firmware Upgrade”
- Select the official file
- Click “Upgrade”
- Once it succeeds → “Reboot”
Do not switch the device off during the process.
3.9 Factory reset
- Hold the Reset button for 5 seconds
- D3 and D4 start flashing
- After the restart – enter the pools and the wallet again
3.10 Shutdown / Restart
Shutdown:
– with the power button
Restart:
– “Reboot” in the bottom right corner
3.11 Viewing the logs
The logs show:
- Hashrate
- Temperature
- Fan speed
- Errors
Categories:
- Current Logs – since the last start
- History Logs – long-term records
4. Common problems and solutions
Power supply
- It does not switch on → check the cable and the voltage
Network
- The indicator is not lit → check the Ethernet cable
Fan
- It does not spin → check its physical condition and the connection to the pool
High temperature
- Check the ambient temperature
- Check the airflow
Low hashrate
- Check the fan
- Check the 12-hour average hashrate
No access to the web interface
- Restart the device
Consumption drops to 150–200W
- Check the network and the indicators